

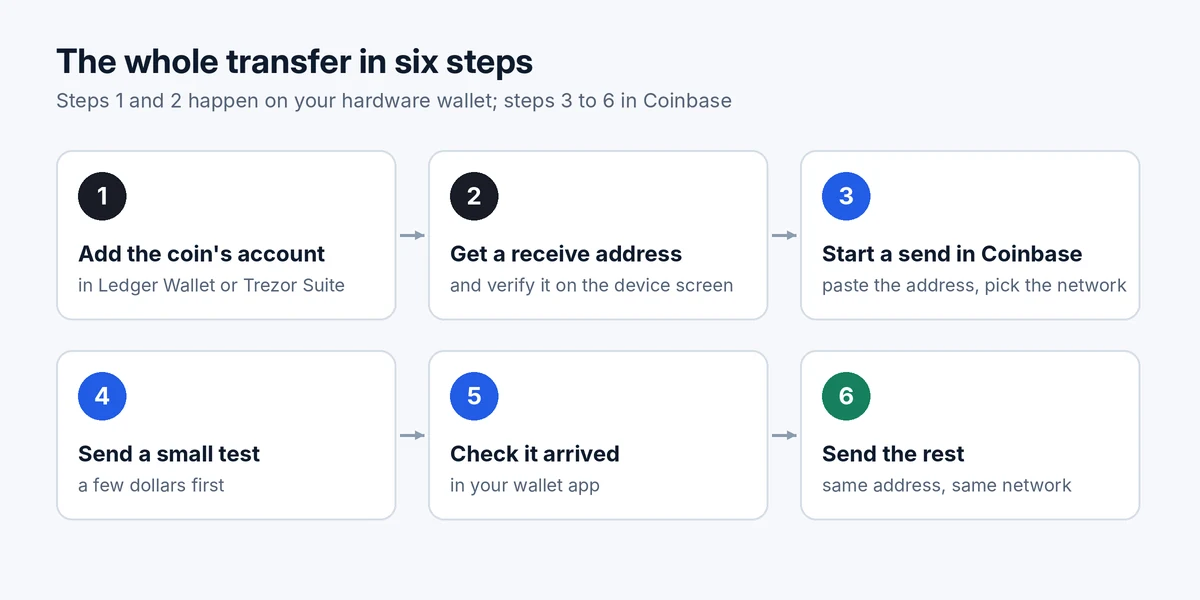
Moving crypto from Coinbase to a hardware wallet takes about 15 minutes. You get a receive address from your hardware wallet, check it on the device’s screen, paste it into Coinbase, choose the matching network and send a small test before moving the rest. The steps below work for any hardware wallet, with specific notes for Ledger and Trezor.
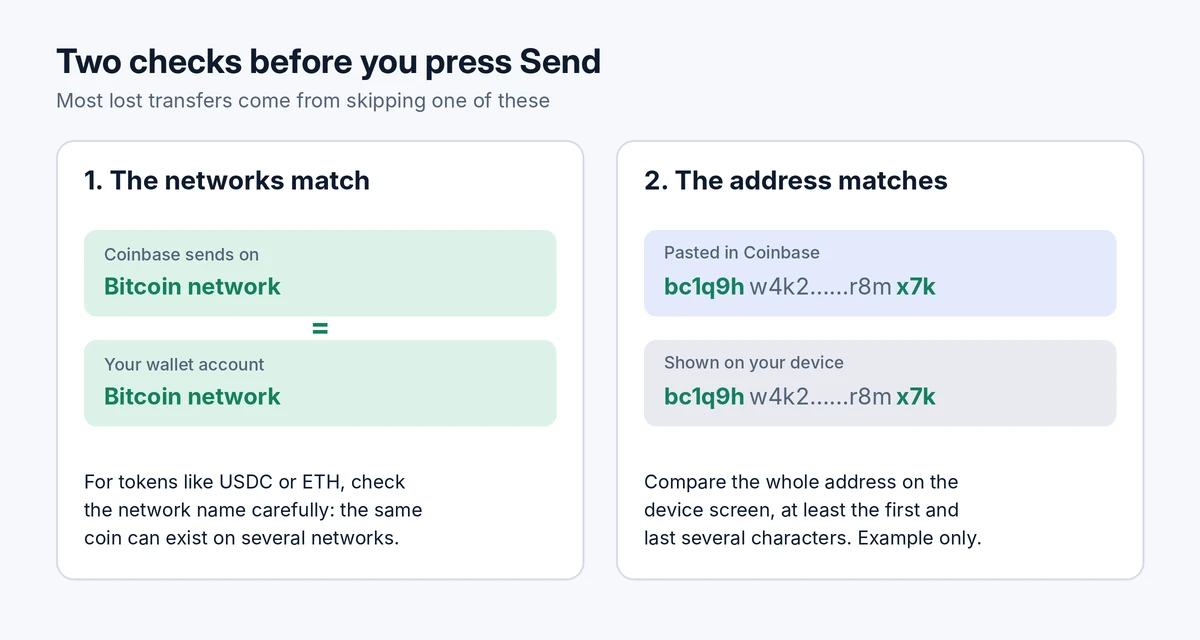
Two things cause almost every failed transfer: picking the wrong network and sending to an address you didn’t verify. If you follow the checks in this guide, you avoid both.
Before you move crypto from Coinbase to a hardware wallet
- Your hardware wallet is set up and you’ve written down its recovery phrase on paper or metal, offline. If not, do that first: how to store a seed phrase safely explains how.
- You have the official app: Ledger Wallet (formerly Ledger Live) for Ledger devices or Trezor Suite for Trezor, downloaded from the manufacturer’s site.
- Your coins can be sent. Crypto bought with a bank transfer may be on hold for a while before it can leave Coinbase. Coinbase explains this in its guide to your available balance; the hold date appears in your purchase confirmation.
- Your hardware wallet supports the coin. Check the manufacturer’s supported list, especially for smaller tokens.
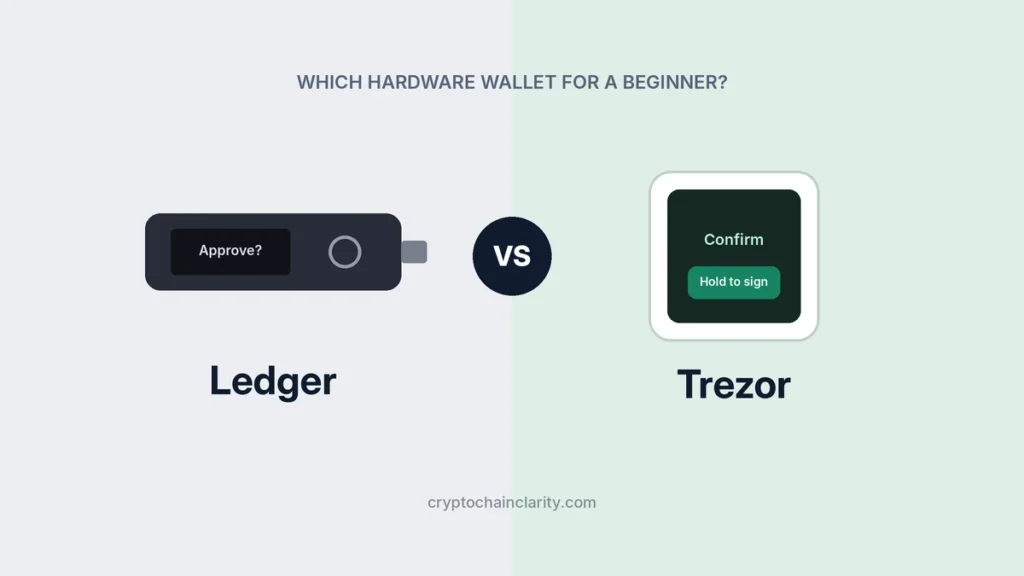
If you haven’t chosen a device yet, see Ledger vs Trezor.
Step 1: Add the coin’s account in your wallet app
Your hardware wallet organizes coins into “accounts”, one per coin and network. Connect and unlock the device, open the app and make sure there’s an account for the coin you’re moving.
- Ledger Wallet: go to Accounts and add an account for the coin. You may be asked to install that coin’s app on the device first; the Ledger Wallet app guides you.
- Trezor Suite: bitcoin and common coins are usually ready. For others, add the coin or network in the settings, then select its account.
For tokens such as USDC or other Ethereum-based tokens, you use the account for the network they run on (for example, your Ethereum account). Tokens don’t get separate addresses.
Step 2: Get a receive address and verify it on the device
Open Receive in your wallet app and pick the account. The app shows an address and a QR code. Before copying it, confirm it on the hardware wallet itself:
- Ledger: the app asks you to verify the address on your device’s screen. Ledger’s guide to receiving crypto covers this step.
- Trezor: select Verify (or “Show full address”) so the address appears on the device, as described in Trezor’s receive guide.
Compare the address on the device with the one on your screen, character by character or at least the first and last six to eight characters. If they match, approve it on the device and copy the address.
This step matters because malware on your computer or phone can swap the address on screen for an attacker’s. It can’t change what the hardware wallet displays, which is why the device screen is the one to trust.
Step 3: Start a send in Coinbase
In the Coinbase app or website, choose to send the coin to an external address. Menu names change from time to time, but the flow is the same:
- Select the coin you want to send.
- Paste the address you copied from your wallet app. Don’t type it by hand.
- Choose the network. This is the most important choice in the whole process. It must match the network of the account you’re receiving into. For bitcoin, choose the Bitcoin network. For ETH or USDC going to an Ethereum account, choose Ethereum, not another network with a similar name.
- Enter the amount. For now, enter a small test amount.
- Review the preview, including the network fee, then confirm with your two-factor authentication.
Depending on your country, Coinbase may ask who owns the wallet you’re sending to. That’s because of rules that require exchanges to record where transfers go. If it’s your hardware wallet, choose the option that says it’s your own (self-hosted) wallet.
Step 4: Send a small test first
Send an amount you wouldn’t mind losing, enough to cover the network fee and show up clearly in your wallet. Yes, you’ll pay the network fee twice, but it’s cheap insurance against a mistake on a large transfer. Why fees vary so much from day to day is explained in what gas fees are.
Step 5: Check it arrived
Open your hardware wallet’s app and look at the account. Most transfers appear within minutes, though they may show as pending until confirmed:
- Bitcoin usually takes 10 minutes to an hour, depending on how busy the network is.
- Ethereum and its tokens usually arrive within a few minutes.
Coinbase’s transaction details include a link to the transaction on a public blockchain explorer, where you can follow its progress. If it’s taking longer than expected, see why a Bitcoin transaction can stay unconfirmed.
Step 6: Send the rest
Once the test arrives, repeat step 3 with the remaining amount, using the same address and the same network. Many hardware wallet apps generate a new receive address each time for privacy; the old addresses still work, so either is fine as long as you verified it on the device. When the transfer arrives, your coins are protected by your hardware wallet and recovery phrase rather than by Coinbase.
A tip for later transfers: turn on Coinbase’s address book or allowlist features and save your hardware wallet’s verified address there. It reduces the chance of a mistake and makes it harder for someone who gets into your Coinbase account to send funds elsewhere. More account protections are in is it safe to keep crypto on an exchange?
If something goes wrong
- The send option is unavailable or greyed out. Your funds are probably on hold after a bank purchase. Check the date in your confirmation email; Coinbase emails you when funds can be sent.
- Coinbase says the address is invalid. You may have selected the wrong network or copied the address incompletely. Copy it again from your wallet app.
- The coins haven’t arrived after an hour. Check the transaction in the blockchain explorer. If it’s confirmed but not showing, make sure you’re looking at the right account and network in your wallet app.
- You sent on the wrong network. Don’t panic and don’t send more. Recovery is sometimes possible depending on the networks involved: see sent crypto to the wrong network.
- Someone contacts you offering help. Coinbase, Ledger and Trezor will never message you first to help with a transfer, and none will ever ask for your recovery phrase. It’s a scam.
Quick answers
Is moving crypto to my own wallet a taxable event?
In the US, moving coins between wallets you control is generally not a sale. The IRS notes that if you only moved assets between your own wallets, you can answer “No” to the digital asset question on Form 1040, as explained on its digital assets page. The network fee you pay may still have tax implications, and rules differ by country, so keep a record of every transfer. Start with what triggers a taxable event.
How much does it cost?
You pay the blockchain’s network fee, which Coinbase shows before you confirm. It depends on the coin and how busy the network is, not on how much you send.
Should I move everything off Coinbase?
Not necessarily. Many people keep a small amount on the exchange for buying and selling and move longer-term savings to their hardware wallet. See crypto wallets explained for how to split your holdings.
Can I move my coins back to Coinbase later?
Yes. In Coinbase, get a receive address for the coin, then send from your wallet app, choosing the same network and approving the transaction on your hardware wallet.
What if I lose my hardware wallet after moving everything?
Your coins are safe as long as you have your recovery phrase. You can restore them on a new device. See what happens if you lose your hardware wallet.
This guide is for educational purposes only. App menus and features change; follow the prompts in the latest version of each app.
Pingback: Best Crypto Wallets for Beginners (2026): 7 Options Compared
Pingback: Is It Safe to Keep Crypto on an Exchange? Risks Explained